Crochet Mandala
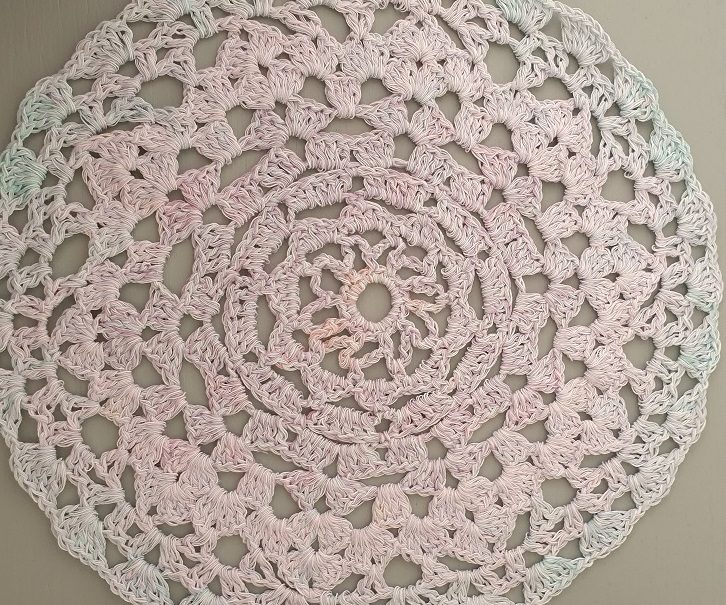
This is a fun and quick project that only takes a few hours and gives a beautiful result. You can make this project with the cotton yarn you like and you can even use some of your scrap yarns.
Materials
- 50 grams of fingering cotton yarn
- 3 mm or D hook
- optional: a steel ring with a diameter of 12 inches or 30 cm.
- a pair of scissors
- a tapestry needle
Terms used/abbreviations
ch chain
sl st slip stitch
sc single crochet
hdc half double crochet
dc double crochet
Notes
This pattern is written in US terms.
Pattern
Ch 10 and close with a slst in the first ch to form a ring
Round 1: ch 1, 20 sc in the ring, close with a sl st in the first sc.
Round 2: ch 1, sc in the first sc, ch 7, skip 1 sc , sc in the next, ch7. Repeat this until you have a total of 10 ch-spaces. Close with a sl in the first sc.
Round 3: 4 sl st in the first ch 7-space, sc in the space, ch 5, sc in the next ch7-space. Repeat until the end, sl st in the first sc to close your round.
Round 4: sl st in the first ch5-space, *sc, hdc, 2dc, hdc, sc all in the ch5-space*. Repeat between the * to the end of the round and close with a sl st in the first sc.
Round 5: sl st 2 times to the first dc. Make a sc in between the 2 dc, ch 7, sc in between the next 2 dc. Repeat until the end of the round, sl st in the first sc to close the round.
Round 6: sl st in the first ch 7-space. Ch 3 and 5 dc in the first ch 7-space. 6 dc in every ch 7-space until the end. Sl st in the first dc to close the round.
Round 7: ch 1 sc in the first stitch, ch 7, skip the group of 6 dc and sc in between the groups dc. So between the first and the second sets of 6 dc. Sl st in the first sc.
Round 8: sl st in the first ch7-space. Ch3, 3 dc, ch 3, 4 dc in the ch7-space. 4 dc, ch 4, 4 dc in every ch7-space around. Close with a sl st in the 3rd ch from beginning ch 3.
Round 9: 4 sl st in the first 4 dc, sl st in the ch3-space, ch 3, 3 dc, ch3, 3 dc in the same ch3-space. Ch 2, 4dc, ch3, 4dc in the next ch3-space. Repeat this to the end of the round. Sl st in the 3rd ch from beginning ch 3.
Round 10: turn your work, sl st in the ch2-sp. Turn your work, ch 3, dc in the ch2-space, ch 2, 4dc, ch3, 4 dc in the next ch3-space, ch 2, 4 dc in the next ch2-space, ch2. Repeat until the end of the round, make 2 more dc in the first ch2-space and close with a sl st in the 3rd ch from the beginning ch 3.
Round 11: 2 sl st in the first 2 dc, sl st in the first ch2-space. Ch3, 2 dc in the same space, ch 2, 3 dc in the same space. 3 dc, ch 2, 3 dc all in the next ch2-space. 4 dc, ch 3, 4 dc in the next ch3-space. Every ch2-space gets 3 dc, ch2, 3 dc and every ch3-space gets 4 dc, ch 3, 4 dc. Repeat until the end and close with a sl st in the 3rd ch from the beginning ch 3.
Round 12: sl st in next dc, sl st in ch2-space. Ch 6, sc in the ch3-space, ch 3, dc, ch 1, dc in the ch2-space, ch 3, dc, ch 1, dc in the next ch2-space, ch 3, sc in the ch3-space. Repeat until the end of the round. Dc, ch 1 in the first ch2-space and close with a sl st in the 3rd ch from the beginning ch 6.
Round 13: sl st into the first ch3-space, ch 3, dc, ch 2, 2 dc in the same space. 2 dc, ch 2, 2 dc in the next ch3-space. Repeat this all the way around and make a sl st in the 3rd chain from the beginning ch 3.
Round 14: sl st into the first ch2-space, ch 3, 5 dc in same space, ch 1, 6 dc in next ch2-space, ch 1. Repeat this until the end of the round, sl st in the 3rd ch from the beginning ch 3.
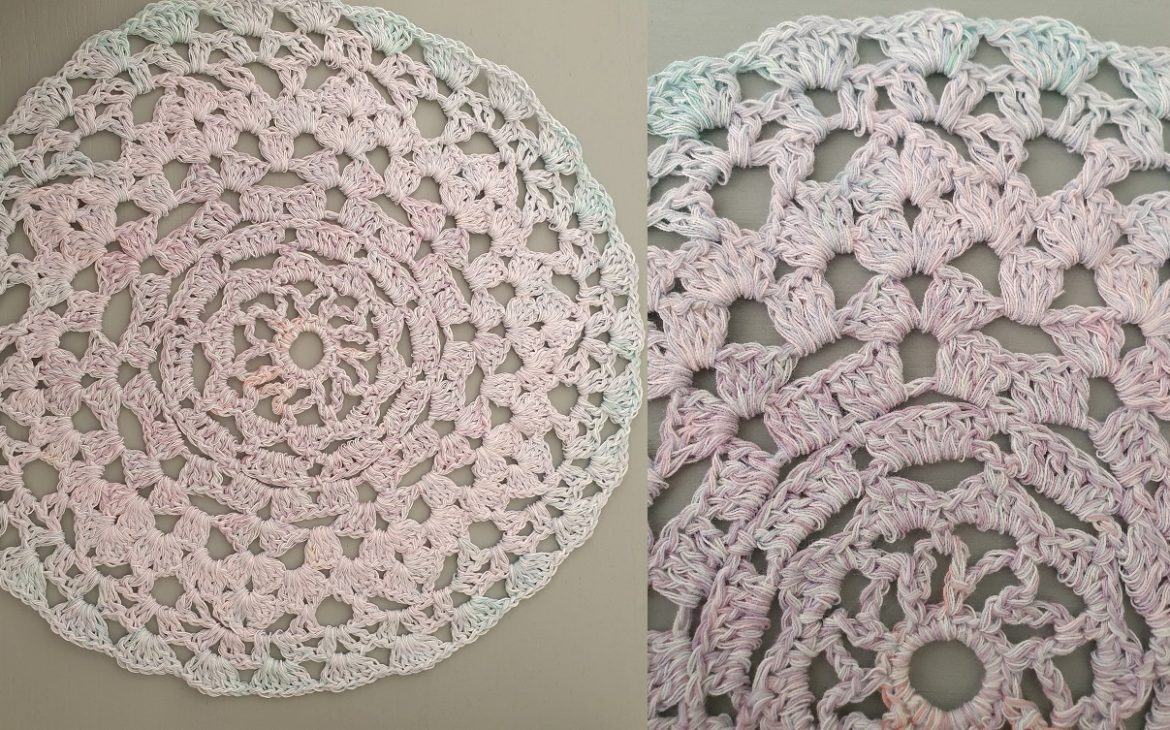
Bind off and weave in your ends. You can attach your mandala in a ring, just like I did with my other mandalas. If you want to see how I did that, click on this link https://2loopz.com/mandala-window-hanger/


You can also find me on: