AGNETA FESTIVAL TOP

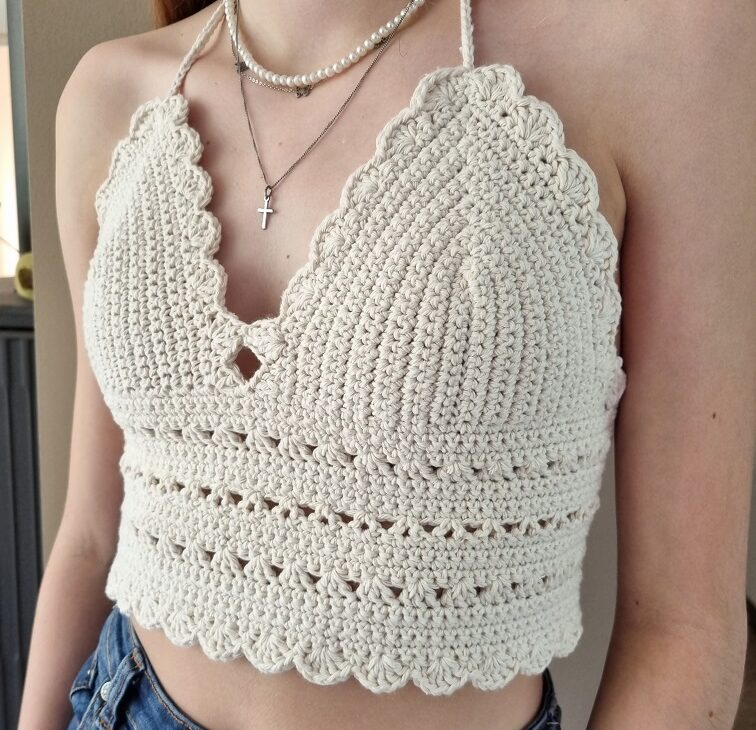
In this pattern I’ll show you how to make this easy to make but stunning top. It takes only a few calculations at the beginning, nothing difficult. Very beginner friendly.
Materials
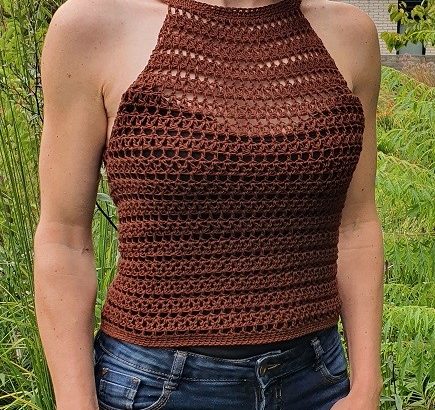
- 2 skeins of Eco Cotton from Lammy Yarns in the color white (or other number 2 yarn) for a size XS, S or M. Every 2 sizes up you need 1 skein extra.
- 4 mm crochet hook
- Optional: 4 beads
- 2 stitch markers
- Scissors
- Tapestry needle
Terms used/abbreviations
Ch chain
Sl st slip stitch
Sc single crochet
Dc double crochet
Notes
This pattern is written in US terms.
Pattern
Cups
We start the pattern with some measuring. First measure from the bottom of your breast to the middle of the nipple. Write that number down. Take your yarn and hook and chain the length you wrote down. Count the stitches you’ve made to reach that length so you know how much you need for the other cup. For my top I needed 14 chains to start with.
Row 1: skip the first ch and sc in every ch across until the last ch. The last one gets 5 sc, mark the middle sc with a stitch marker. Work 1 sc in every ch along the other side. Check if both sides have the same amount of stitches.
Row 2: ch 1, turn your work. Sc in every stitch across until the stitch with the stitch marker. This stitch gets 3 sc (mark the middle one with the stitch marker). Sc in every stitch to the end of the row.
Repeat row 2 until the cup covers the breast. I made 11 rows (53 stitches per cup).


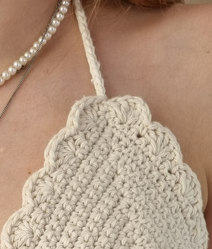
Border cups
Count all of your stitches around the cups. If this number is divisible by 4 + 2 then you can go to the next step. If your stitch count isn’t divisible by 4 + 2 you need to calculate how many stitches you have to subtract or add to get the stitch count correct. You can do this by skipping 1 sc more or less between the groups of dc in the next step. You will not see this in the end result. If your stitch count is correct you don’t have to do this.
Ch 1 and sc in the first stitch. Skip 1 stitch (skip to if you need to correct your stitch count, you can repeat this as much as necessary) 5 dc in the next stitch, skip 1 stitch, sc in the next. Repeat this until the other side of the cup.
Make another cup exactly the same and bind off. Put them next to each other on the table and measure the width of the bottom of both cups (33 cm. for me). Write that down and put them aside, we start the bottom part now.
Bottom part
Measure under your breasts around your waist (67 cm. for my top). Subtract the number you wrote down for the bottom of both cups from this number, 67-33= 34 cm. Divide this by 2, 34:2= 17 cm.
This number is the length of 1 side of your top. Row 1: Make a foundation sc for this length in multiples of 3. If you want to learn how to make a foundation sc click on this link https://2loopz.com/how-to-make-a-single-crochet-foundation-chain/
Count your stitches.
Take one of your cups and make a sc in the bottom corner to attach the foundation sc to the cup. Sc in every row along the bottom of the cup and make 3 sc in every dc. At the end of cup 1 get cup 2 and make a sc in the bottom corner of this cup and sc in every row across the bottom and also 3 sc in every dc. Make sure you have a multiple of 3, if not then add or subtract some stitches along the bottom of the cups. Now make a foundation sc for the other side and make sure you have the same amount of stitches that you have on the other side.
There is a total of 129 stitches for my top.
Row 2: ch 1 and turn your work. sc in every stitch across.
Row 3-4: Repeat row 1.
Row 5: ch 3 and turn your work. this ch 3 counts as your first dc. Skip 2 sc, 3 dc in the next sc, skip 2 sc and 3 dc in the next. Repeat until you have 3 sc left. Skip 2 sc and make a dc in the last stitch.
Row 6-9: Repeat row 2
Row 10: ch 3 and turn your work. This ch 3 counts as your first dc. Skip 2 sc and in the next make a dc, ch 1, dc (all in 1 stitch). Skip 2 sc, dc, ch 1, dc in the next sc. Repeat until you have 3 sc left. Skip 2 sc and dc in the last.
Row 11-14: Repeat row 2
Row 15: Repeat row 5
Row 16-20: repeat row 2
Border
The last row is the same border as we did around the cups. We need a multiple of 4 + 2 for this. So count your stitches and adjust the stitch count in the last row exactly the same as you did for the cups. By skipping 1 sc extra for as much as you need to get the stitch count correct.
Row 21: ch 1, turn your work. sc in the first stitch, skip 1 sc, 5 dc in the next sc, skip 1, sc in the next. Repeat until the end and adjust where necessary.
Straps
We need 3 straps, 2 for the neck and 1 for the back. The straps for the neck I made 65 cm. each and for the back 75 cm.
For each strap you measure the yarn 3 times the length of your strap length, this length is the length you need for your tail end.
Make a slip knot on your hook. Place the tail end on the front and the working yarn on the back. If you want an easy tutorial, click here:
Yarn over with the tail end from front to back, yarn over with the working yarn and pull through both loops on the hook. Repeat this until the length you need. Tie a knot and attach your beads if you want.
Sew the other end of the strap to the top of the cup.
Do the same for the other strap.
The back strap gets fringe on 2 sides so before you make a slip knot make a normal knot where you want your fringe to start and attach the bead if you want. Then make a slip knot with your working yarn and start making the back cord. If it is the length you want make a knot and feed it through the back. Then attach the bead otherwise you can’t feed it through the work.
Put it on with a fancy bottom and let’s party.


You can also find me on: