Rhea Dress
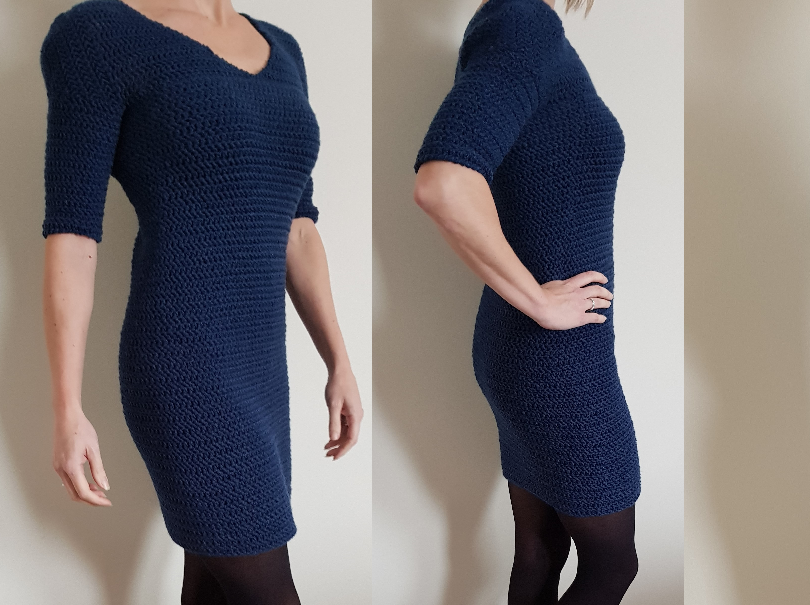
Today I teach you how to make a simple but beautiful dress. The dress is easy adjustable to any size.
Materials
- 6 skeins of Iceyarns Saver 100 (or other worsted weight yarn)
- H/8 or 5 mm crochet hook
- stitchmarkers
- Scissors
- Tapestry needle
Terms used/abbreviations
- Ch chain
- Hdc half double crochet
- Hhdc herringbone half double crochet
- Hdc2tog half double crochet 2 together
- Hhdc2tog herringbone half double crochet 2 together
- Sl st slip stitch
- WS wrong side of your work
- RS right side of your work
Special stitches
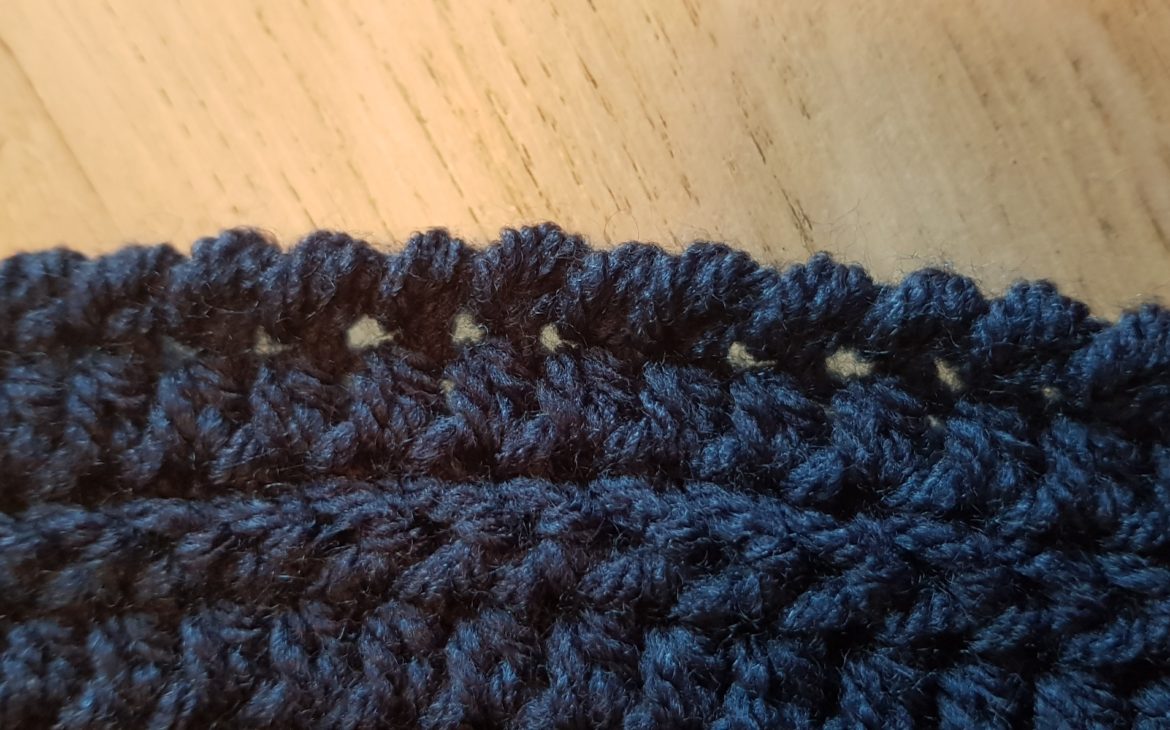
Hhdc: It is almost the same as the normal half double crochet, only in this case you yarn over, insert hook into the stitch and pull up a loop, you have 3 loops on your hook. Pull the first loop through the second, as if you make a slip stitch. Yarn over and pull through the last two loops on your hook.
Notes
- This pattern is written in US terms.
- Gauge 4”x 4”: 11 rows of 12 hdc
- If you prefer a seamless join, click on this link https://2loopz.com/chainless-starting-stitch-and-seamless-join/ to learn how to do that. If you use this method you don’t see a visible start throughout your work. Don’t turn your work before each round if you choose to start this way.
Pattern
Body
Start with a half double crochet foundation chain, make this chain so long that it fits around the widest part of your chest. For a size S I made 108 stitches. Close the round with a sl st in the first hdc, make sure your foundation chain isn’t twisted. (WS)
Round 2: turn your work and make a hhdc in every stitch around. Close your round with a sl st in the first hhdc. (RS)
Round 3: turn your work and make a hdc in every stitch across. Close the round with a sl st in the first hdc. (WS)
Round 4-12: repeat rounds 2 and 3 or as many times to cover your whole breast area. Always end with a round of hhdc.
Lay your work flat on the table and put 2 stitchmarkers on your beginning and on your other end. (RS)

Round 13: in this round we are going to decrease. Turn your work and work hdc2tog in the first 2 stitches. Hdc in every stitch until you reach the next stitchmarker. Work hdc2tog in this stitch and the next. Make hdc in every stitch until the end. Sl st in the first stitch to close the round. I’ve got 106 stitches left. (WS)
Round 14: repeat round 2
Round 15: repeat round 13 (104)
This is the time to see if your work fits. If you need no more decreasing around your waist than repeat for rounds 16 and 17 rounds 2 and 3. If you need a bit more decreasing, work round 16 as round 14 and for round 17 repeat round 13.
Round 18-38: repeat rounds 2 and 3
It is time to fit your work again. If you reached your hips then it is time to increase. If you need more rounds to reach your hips than repeat rounds 2 and 3 one more time. If you make extra rounds, make sure you end with a round of hhdc.
Round 39: We are going to increase, turn your work. So we put 2 hdc in the stitches with the stitchmarker. Every other stitch gets 1 hdc.
Round 40: Turn your work. Hhdc in every stitch around.
If you have curvy hips than you can increase in the rounds of hhdc as well. Just
fit every now and then to see if you’re size is right. If not then adjust by
increasing a bit more or less.
Round 41-47: repeat rounds 23 and 24
Round 47-60: repeat rounds 2 and 3.
Round 61: It is time to decrease a bit, so repeat round 13.
Round 62: repeat round 2
Round 61: repeat round 13.
Repeat rounds 61 and 62 until round 74 or until you
reach the desired length.
Fasten off and weave in your ends.
Front panels
We now make the upper part of your dress. We start with 2 front panels first.
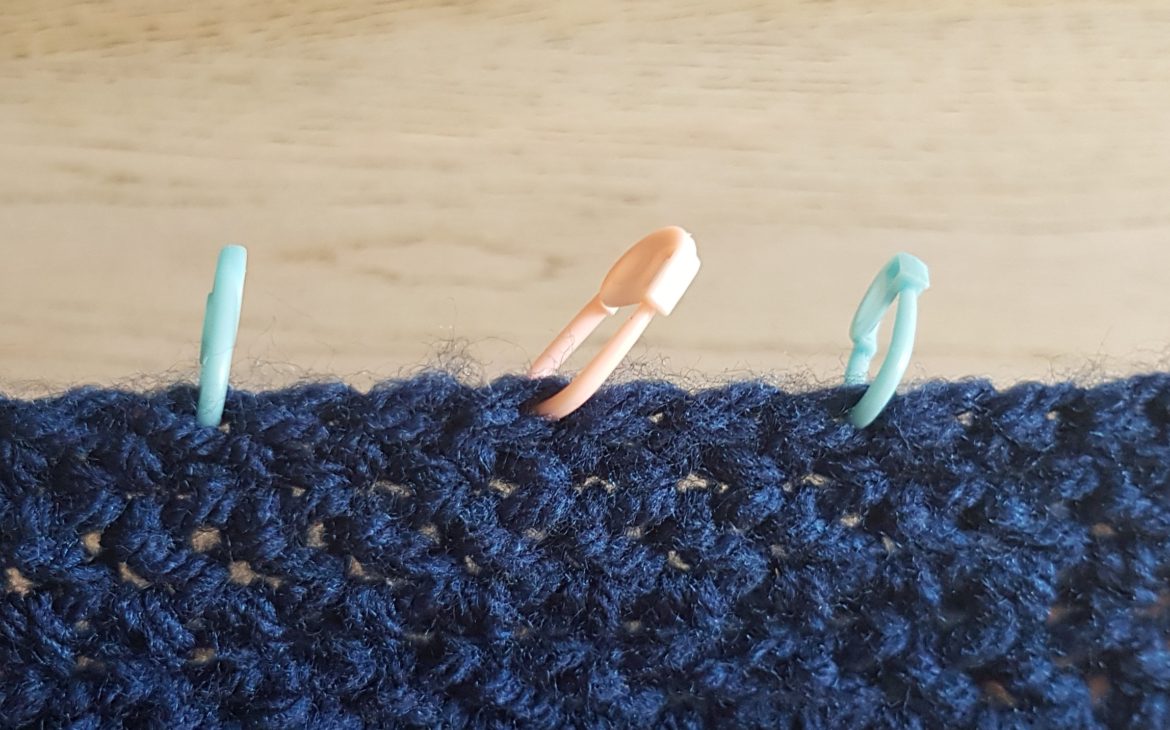
Lay your work flat on the table and count from the stitchmarker 3 stitches to the front side. Put a stitchmarker in this stitch. Then count 3 stitches from the first (middle) stitchmarker to the back and put a stitchmarker in this stitch. You can remove the middle one. You have 5 stitches between the 2 stitchmarkers. This is the space for your armholes. Repeat this on the other side. Place another stitchmarker in the middle stitch of the front. If you don’t have a middle stitch then put the stitchmarker in between the middle 2 stitches.
Attach your yarn in the stitch at the right front stitchmarker. Row 1: Ch 2 (this doesn’t count as a stitch), and work hhdc until the stitch before the stitchmarker (if you’re stitchmarker is in between 2 stitches then leave 2 stitches unworked before the stitchmarker), hhdc2tog in the last 2 stitches. To make a hhdc2tog you yarn over, insert in the first stitch, pull up a loop and pull the first loop through the second loop (just as a normal hhdc), leave the loops on your hook, yarn over again, insert in the next stitch, pull up a loop, pull the first loop through the second, yarn over and pull through all loops on your hook.
Row 2: ch 2, turn your work. Hdc2tog in the first 2 stitches. Hdc in every stitch across.

Row 3: ch 2, turn your work. Hhdc in every stitch
until you reach the last 2 stitches. Use the horizontal bar and the front loop
to insert your hook in. We do this because if we don’t we see the difference
between working in the round and working in rows.
Do this for every row of hhdc. Hhdc2tog in the last 2 stitches.
Row 4-14: repeat rows 2 and 3
Row 15: ch 2, turn your work, hdc in every stitch across.
Row 16: ch 2, turn your work, hhdc in every stitch across.
Repeat rows 15 and 16 until you reach the top of your shoulder. Bind off and weave in your ends.
Attach your yarn in the middle of your front panel (where the middle stitch marker is). This side is the same as the right side, but then the other way around.
Row 1: Ch 2 and work a hhdc2tog in the first 2 stitches, hhdc in every stitch across. Use the horizontal bar and the front loop to insert your hook in.
Row 2: ch 2, turn your work, hdc in every stitch until the last 2 stitches. Hdc2tog in these 2 last stitches.
Row 3: ch 2, turn your work, hhdc2tog in the first 2 stitches, hhdc in every stitch across.
Row 4-14: repeat rows 2 and 3
Row 15: ch 2, turn your work, hdc in every stitch across.
Row 16: ch 2, turn your work, hhdc in every stitch across.
Repeat rows 15 and 16 until you reach the top of your shoulder. Bind off and weave in your ends.
Back panel
Attach your yarn at the right back corner (where your stitch marker is)
Row 1: ch 2 (this doesn’t count as a stitch), hhdc in every stitch across. Use the horizontal bar and the front loop to insert your hook in.
Row 2: ch 2, turn your work. Hdc in every stitch across.
Row 3-14: repeat rows 1 and 2.
Row 15: ch 2, turn your work. Hhdc in the next 11 stitches, hhdc2tog in the next 2 stitches.
Row 16: ch 2, turn your work. Hdc in the next 10 stitches, hdc2tog in the last 2 stitches.
Row 17: ch 2, turn your work. Hhdc in the next 9 stitches, hhdc2tog in the last 2 stitches.
Bind off and leave a tail to sew the front and the back together.
Attach your yarn 13 stitches from the other side.
Row 15: Ch 2, hhdc2tog in the first 2 stitches, hhdc 11 stitches.
Row 16: ch 2, turn your work. Hdc in the next 10 stitches, hdc2tog in the last 2 stitches.
Row 17: ch 2, turn your work. Hhdc2tog in the first 2 stitches, hhdc in the next 9 stitches.
Bind off and leave a long tail to sew the front and the back together.
Sew the shoulder straps together.
Sleeves
Attach your yarn in front corner of the armhole.
Row 1: ch 2, hdc in every row until you reach the other corner. The 5 stitches under the armpit you leave unworked. Insert your hook in the stitch instead of in the hole to create a nicer finish.
Row 2: ch 2, turn your work. Hhdc2tog in the first 2 stitiches, hhdc in every stitch across until the last 2 stitches, hhdc2tog in the last 2 stitches.
Row 3: ch 2, turn your work. Hdc2tog in the first 2 stitches, hdc in every stitch across, hdc2tog in the last 2 stitches.
Row 4: ch 2, turn your work. Hhdc2tog in the first 2 stitches, hhdc until the stitch before the middle. In the stitch before the middle, the middle and the stitch after the middle you make a hhdc3tog. Hhdc until the last 2 stitches, make a hhdc2tog in this last 2.
Row 5: ch 2, turn your work. Hdc2tog in the first 2 stitches, hdc until the stitch before the middle. In the stitch before the middle, the middle and the stitch after the middle you make a hdc3tog. Hdc until the last 2 stitches, make a hdc2tog in this last 2.
Row 6-8: repeat rows 4 and 5.
Row 9: ch 2, turn your work. Hdc3tog in the first 3 stitches, hdc until the stitch before the middle. In the stitch before the middle, the middle and the stitch after the middle you make a hdc3tog. Hdc until the last 3 stitches, make a hdc3tog in these last 3.
Close the gap at the side with slip stitches. Bind off and weave in your end.
Round 1: Attach your yarn in the corner of the sleeve opening and ch 2, make hhdc around the sleeve. Just eyeball how many stitches you should make but it is about 1 hhdc per row. Close the round with a slst or use the seamless join.
Round 2-9: alternate rounds of hdc and rounds of hhdc in every stitch around. Close every round with a slst.
Round 10: hdc2tog in the first 2 stitches, hdc in every stitch around, close with a slst.
Round 11: hhdc in every stitch around, close with a slst.
Round 12-20: repeat rounds 10 and 11.
Finish with a round of crab stitches. The crab stitch is a reversed sc so instead of making your stitches in the same direction you’ve made all of your stitches, we go backwards. Insert your hook in the stitch before the first stitch and make a sc. Then make a sc in the stitch before this stitch and so on. Repeat this all the way around and make a sl st in the first stitch.
Make the other sleeve the same way.
Border
Attach your yarn on the bottom of your dress and make a round of crab stitches around the bottom. Close with a slip stitch. Bind off.
Attach your yarn at the shoulder seam of your neckline and make a round of crab stitches around the neckline. Close with a slip stitch.
Bind off and weave in all ends.
Your dress is ready to party!!!


You can also find me on: